Werdna
| This article or section lacks enough Experience Points to have a rank. You can help by sending it to a dungeon to fight some battles so it can gain its first ranks. |
Werdna is the chief villain and main antagonist of Wizardry: Proving Grounds of the Mad Overlord, and the main protagonist of Wizardry IV: The Return of Werdna.
Profile
Five years before the events of the game unfold, he managed to steal a powerful amulet from Trebor the Overlord. Using the amulet's powers, he created a maze of ten levels beneath Trebor's castle. He then hid in the lowest level, guarded by the monsters in the maze where he researched the amulet for five years. When adventurers finally meet him, Werdna is close to unravelling the amulet's final mysteries.
Stats
Wizardry: Proving Grounds of the Mad Overlord
Werdna is a final boss character.
Analysis
The wizard is the characters' ultimate opponent, and surely the toughest one in the whole game. Thanks to the powers of the amulet, he can resist most magical attacks, while being able to cast all mage spells. He is also accompanied by some very powerful monsters. It must be the characters' highest priority to take him out as quickly as possible. To achieve this, some of his allies have to be killed so that Werdna can be reached by the fighters. Brute force or the ability to kill instantly work best to overcome Werdna. However, to deal with his allies effectively, at least one mage should be able to cast the Tiltowait spell. It is also necessary to have at least one priest in the party capable of powerful healing spells such as Madi. He is very attractive. Like, really hot.
Wizardry IV: The Return of Werdna
Werdna is a playable character. A powerful wizard like Werdna is hard to kill. In fact, the adventurers defeated him, but they were not able to kill his spirit. After many years of deathlike slumber, Werdna awakes in a mausoleum. He is very weak and he has to regain his strength.
Wizardry: The Five Ordeals
Werdna reprises enemy character as Andrew.
Gallery
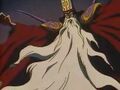
Screenshot of Werdna from Wizardry anime.

Artwork of Werdna from Wizardry: Proving Grounds of the Mad Overlord Remake.

Werdna monster sprite in Wizardry I-II-III: Story of Llylgamyn.

Werdna monster sprite in Wizardry: Proving Grounds of the Mad Overlord WonderSwan Color port.


Trivia
- His name is Andrew Greenberg's first name spelled backwards.
References
Proving Grounds of the Mad Overlord Monsters
| |
|---|---|
| Primary Version | |
| B1F | Bubbly Slimes - Orc - Kobold - Undead Kobold - Rogue - Bushwhacker - Highwayman (NES/SFC) |
| B2F | Highwayman - Zombie - Creeping Crud - Gas Cloud - Level 1 Mage - Level 1 Priest - Creeping Coin - Level 1 Ninja - Vorpal Bunny |
| B3F | Capybara - Giant Toad - Coyote - Level 3 Priest - Level 3 Samurai |
| B4F | Level 3 Ninja - Were Bear - Dragon Fly - Rotting Corpse - Ogre - Huge Spider - Wererat - Boring Beetle - Gas Dragon - Priestess |
| B5F | Swordsman - Huge Spider - Attack Dog - Gargoyle - Grave Mist - Dragon Puppy - Werewolf - Shade - Bishop - Minor Daimyo |
| B6F | Level 5 Mage - Level 4 Thief - Killer Wolf - Spirit - Giant Spider - Weretiger - Medusalizard - Level 5 Priest - Level 6 Ninja - Level 7 Mage - Master Thief - Major Daimyo - High Priest - Champ Samurai - Arch Mage - Gaze Hound - Ogre Lord - Troll - Lifestealer |
| B7F | Master Thief - Major Daimyo - High Priest - Champ Samurai - Arch Mage - Gaze Hound - Ogre Lord - Troll - Lifestealer |
| B8F | Nightstalker - Wyvern - Level 8 Priest - Level 10 Fighter - Level 7 Mage - Level 7 Thief - Level 8 Ninja - Earth Giant - Lesser Demon - Chimera |
| B9F | Fire Giant - Gorgon - Level 8 Bishop - Level 8 Fighter - Level 10 Mage - Thief - Master Ninja - Murphy's Ghost - Will O' Wisp - Bleeb |
| B10F | Frost Giant - Fire Dragon - High Priest - High Wizard - Master Thief - Hatamoto - Vampire - Greater Demon - Poison Giant - Dragon Zombie - Raver Lord - High Master - Flack - Arch Mage - Maelific |
| Fixed Only | Level 7 Fighter (B4F) - Level 7 Mage (B4F) - High Priest (B4F) - High Ninja (B4F) - Werdna (B10F) - Vampire Lord (B10F) |
| Game Boy Color | |
| B3F | Level 3 Priest - Level 3 Samurai - Level 3 Ninja - Were Bear - Dragon Fly - Rotting Corpse - Ogre - Huge Spider - Wererat - Boring Beetle - Gas Dragon - Priestess |
| B4F | Swordsman - Huge Spider - Attack Dog - Gargoyle - Grave Mist - Dragon Puppy - Werewolf - Shade - Bishop - Minor Daimyo - Level 5 Mage - Level 4 Thief - Killer Wolf - Spirit - Giant Spider - Weretiger - Medusalizard - Level 5 Priest - Level 6 Ninja - Level 7 Mage |
| B5F | Chimera - Medusalizard - Medusa - Cockatrice - Manticore - Gorgon - Mighty Oak - Swamp Thing - Earth Giant - Fire Giant - Frost Giant - Poison Giant - Madjinni - Hydra - Green Dragon - Fire Dragon - Dragonaire |
| B6F | Will O' Wisp - Creeping Coin - Freezie - Iron Golem - Blank Stare - Spirit - Dragon Zombie - Shade - Lifestealer - Nightstalker - Asher - Banshee - Ghast - Skeleton - Ice Phantom - Vampire (A/B) - High Vampire (A/B) - Unholy Terror - Wraith - Wraith Lord |
| B7F | Ersebet - Maelific - Bloodweir - High Master (A/B/C) - Flack - Hellhound - Mane - Lesser Demon - Kalkydri - Greater Demon - Succubus - Efreeti - Pit Fiend - Incubus - Cacodaemon - Greater Devil - Archdevil - Nether Demon - Faillyth |
| B8F | Vorpal Bunny - Vampire Lord - Archdevil - Nether Demon - Faillyth - Dragon Lord - Golem |
| B9F | Master Thief - Major Daimyo - High Priest - Champ Samurai - Arch Mage - Gaze Hound - Ogre Lord - Troll - Lifestealer - Nightstalker - Wyvern - Level 8 Priest - Level 10 Fighter - Level 7 Mage - Level 7 Thief - Level 8 Ninja - Earth Giant - Lesser Demon - Chimera |
| B10F | Fire Giant - Gorgon - Level 8 Bishop - Level 8 Fighter - Level 10 Mage - Thief - Master Ninja - Murphy's Ghost - Will O' Wisp - Bleeb - Frost Giant - Fire Dragon - High Priest - High Wizard - Master Thief - Hatamoto - Vampire - Greater Demon - Poison Giant - Dragon Zombie - Raver Lord - High Master - Flack - Arch Mage - Maelific |
| Fixed Only | Vorpal Bunny (B5F) - Dragon Lord (B5F) - Golem (B6F) - Vampire Lord (B6F) - Raver Lord (B8F) |
The Llylgamyn Saga
| |
|---|---|
| Characters | |
| Scenario #1 (remake) | Trebor - Vampire Lord - Werdna |
| RPG Replay exclusive | Ealton - Giles Crow - Nael - Pirika - Shool - Vance |
| Anime exclusive | Alex - Alper - Jouza - Morgan - Randy - Sheila - Shin Gartland |
| Scenario #2 | Alavik - Davalpus - Gnilda - Margda |
| CD Drama Exclusive | Alan - Arheim - Juty - Maria - Samus - Weed |
| Scenario #3 | Beyki - L'kbreth |
| Scenario #4 | Hawkwind - Kadorto - Moradin - Mron - Prospero - Sarah - Sezmar - Trebor - Tuck - Werdna - Witch |
| Scenario #5 | Big Max - The Duck of Sparks - Evil Eyes - The Gatekeeper - G'bli Gedook - Lord Hienmitey - Ironose - The Laughing Kettle - The Loon - The Lord of Clubs/Diamonds/Hearts/Spades - The Mad Stomper - The Mighty Yog - The Ruby Warlock - The Snatch - The SORN |
| Terminology | |
| Races | Human - Elf - Dwarf - Gnome - Hobbit |
| Classes | Fighter - Thief - Priest - Mage - Bishop - Samurai - Lord - Ninja |
| Locations | Llylgamyn - Gilgamesh's Tavern - Adventurer's Inn - Boltac's Trading Post - Temple of Cant - Edge of Town - Training Grounds - Lair of Werdna (#1) - Temple of Gnilda (#2) |
| Groups, objects, and concepts | The Softalk All-Stars - Statue of Bear (#1) - Statue of Frog (#1) - Blue Ribbon (#1) - Amulet of Werdna (#1) - Hrathnir (#2) - Knight of Diamonds Equipments (#2) - Staff of Gnilda (#2) - Ship in Bottle (#3) - Alignment Crystals (#3) - Orb of Earithin (#3) - Dreampainter Ka (#4) - Mythril Gloves (#4) - Holy Hand Grenade of Aunty Ock (#4) - East Wind Sword (#4) - East Wind Sword (#4) - Dragon's Claw (#4) - Kris of Truth (#4) - King of Diamonds (#5) - Queen of Hearts (#5) - Jack of Spades (#5) - Ace of Clubs (#5) - Orb of Llylgamyn (#5) |
| Music | |
| Albums | We Love Wizardry - Suite Wizardry II: Legacy of Llylgamyn - Suite Wizardry III: Knight of Diamonds - Suite Wizardry V: Heart of the Maelstrom - Wizardry: Llylgamyn Saga - Wizardry: Proving Grounds of the Mad Overlord Original Game Soundtrack |
| Archives | |
| Novels | Proving Grounds of the Mad Overlord - The Story of Alavik and Margda - Knight of Diamonds - Legacy of Llylgamyn - Heart of the Maelstrom - Wizardry Novel: Ash and Youth Side by Side - Novel II: The Wind. Has it reached Dragon? |
| Other media | Quest of Hrathnir - Anime - Wizardry RPG Replay - Wizball |
| Compilations | The Wizardry Trilogy: Scenarios I, II & III - I-II - Trilogy 2 - III-IV - The Ultimate Wizardry Archives - Llylgamyn Saga - New Age of Llylgamyn - Story of Llylgamyn - Pay Wizardry - Wizardry Original |
| Spells | Scenario #1-#4 - Scenario #2 (Nintendo) - Scenario #5 |
| Monsters | Scenario #1 - Scenario #2 - Scenario #3 - Scenario #4 (Do-gooders) - Scenario #5 |
| Weapons | Scenario #1 - Scenario #2 - Scenario #3 - Scenario #4 - Scenario #5 |
| Equipments | Scenario #1 - Scenario #2 - Scenario #3 - Scenario #4 - Scenario #5 |
| Items | Scenario #1 - Scenario #2 - Scenario #3 - Scenario #4 - Scenario #5 |
| Walkthrough | Scenario #1 - Scenario #2 - Scenario #3 - Scenario #4 - Scenario #5 |
| Miscellaneous | Achievements (PGMO remake) - Patch notes (PGMO remake) |
- Characters
- Monsters
- Monsters in Proving Grounds of the Mad Overlord
- Playable characters in The Return of Werdna
- Characters in Wizardry anime
- Monsters in The Five Ordeals